
j.c.f.'s schematics.
Last Updated 11/27/00.
Hits since 11/25/00:

In the same way that I prepare sheet music, periodically I want something that can't be had or is too easy to build, so I build it. Sometimes what I build is actually worth telling other people about...
The Gong Clock.
I don't like being violently torn from sleep's dear bosom in the morning and years ago I was fond of snoozing for arbitrary periods before actually getting up, so I formulated a desire for an alarm clock that you could decide to snooze through, one that wouldn't require physical action to get it to stop trying to get one up (the concomitant state of alertness that goes with physical action being exclusive to snoozing) and that also didn't pierce the sleeping haze with the subtlety of a nuclear weapon. It would have to have a brief and mellow way of signaling that maybe it would be a good idea to get up instead of the outright and persistent demands made by all alarm clocks I had ever experienced.
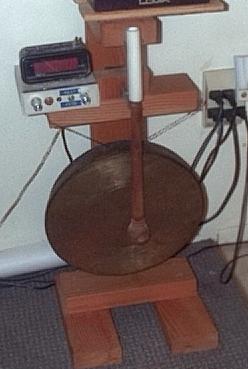
So the plans for the Gong Clock were laid, it would strike as large a gong as I could get my hands on, it would strike it at a specifyable strength and at a specifyable period as well, anywhere from once a second to once an hour.
First an alarm clock had to be found and seeing as I had no idea whether the finished product would be worth keeping I skimped on the thing, big mistake. Of course once the Gong Clock proved to be an indispensable part of my sleeping I was left with these incredibly irritating chintzy buttons, soo, out with hot meld glue and some better buttons and we have a much nicer clock. I'll probably replace those buttons one day too, with something like a keyboard key is my guess:
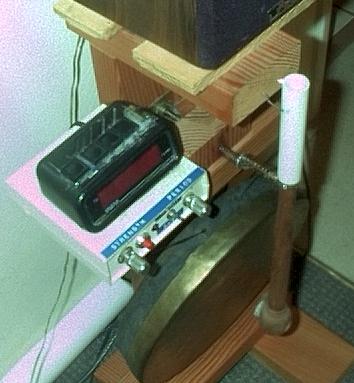
As I said, this device has evolved over time, the big white tube you see on the mallet was added when a larger gong was obtained and the whole thing needed to be lengthened (in a later shot you can see plywood screwed to the base to extend the upright as well). The white blob on the end of the mallet is a small circle of industrial felt stuck over another small circle of leather, this strikes the gong in a much more mellow fashion than a plain wood mallet does. Return springs for the mallet (I've used two with a washer between them) are musical instrument parts I bought from Ferree's Tools one day when buying parts for my flutes, you need some pretty soft springs:
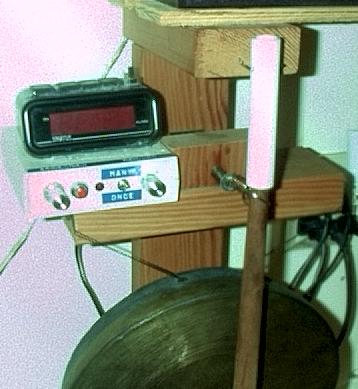
From the side you can vaguely make out the solenoid placement details, it's embedded in the upright in the rear. The pull arm is 1/16" stainless steel welding rod, where it passes through the front block of wood I have a nylon bushing (actually a PC board standoff) lining the hole:

You can see the solenoid mounted in the upright clearly from the back:

And to cap the whole thing off, it's solid enough to support my right bedroom speaker and the dozen flower vases on top that. Number 1 two by fours, I'm no carpenter:

Electronic Construction.
To build the thing you'll have to assemble the following schematic:
I bought most of the parts from the Newark Electronics catalog, a great way to buy things but it's not cheap, I prefer the convenience myself. Notable Newark parts include:
- 81F2457, an LB1210 low profile transformer.
- 67F5614, a T6x12 I-12D solenoid.
- 87F284, the Bud box.
To build it I melted a hole into the top of the Bud box and the bottom of the clock, attached some extra line cord to the 110V with the twist nuts already connecting the line voltage to the clock's transformer, ripped out the piezo electric buzzer and routed it's wires and the extra line cord into the Bud box and then glued the two together with some, guess what, hot meld glue -- you can tell I love the stuff. I show the coarse period selector on the schematic as a series of DIP switches, in fact I used a hexadecimal encoder (50F7509) but that's overkill, assuming you use the values I use for the timing components a value of 7 (A, B, and C closed, D open) will give a half hour maximum striking period.
There are several considerations in the design of that schematic that aren't exactly obvious:
- First is that weird power supply, it's weird because the solenoid can sink enough current to seriously sag the power rail and a bigger transformer (a) wouldn't fit in the box and (b) didn't exist as a low profile part anyway. With the diode and the second capacitor the logic has enough of a pool of power to not fail when the solenoid loads up the transformer.
- The zener is used as a regulator instead of some nice TO-3 regulator because the rectified output of the transformer is close to 12V (only 10V windings) so the things like the LM340T-12 aren't going to cut it.
- I know the 4536 can be made to oscillate making the 555 redundant, the circuit operated that way for years, however, when SET is used to inhibit counting on the 4536 (and we have to use SET so the solenoid fires when the alarm goes off and not after the delay) the oscillator relies on pure noise to start oscillation and sometimes that noise can be a long time coming... I'd wake up quite some time after the thing was supposed to have gone off (now late for Sunday morning golf, damn) glare at the alarm but it's Triggered light is glowing away and I'm scratching my head going "Did I really sleep right through that?" One day I caught the thing red handed, Triggered light came on and nothing is happening with the mallet, and I'm going "WTF!" So for months (years actually) I'm trying various combinations of diodes and resistors to try and get a falling signal on the oscillator input but 100% reliability eluded me and in a fit of pique one day I angrily stuck the 555 in there and it's been a golden 100% reliable ever since.
- The Once/Many switch is shown correctly, it's a kludge. When set to Once it simply forces all stage inputs to high which should be a long enough repeat period such that the alarm's output will cease no matter what the clock frequency is set to with the Period trim pot. Note that since the 555 has been added for a clock the inhibit on the 555 could probably be used for the Once/Many function, this would save a little power wastage, I'm not about to rebuild my circuit for what amounts to aesthetic engineering principles however.
The "Hard" and "Soft" adjustments are to adjust the strength with which the gong is struck when the Strength setting is at maximum and minimum. To set them set the Strength potentiometer to minimum and adjust the "Soft" adjustment until the mallet is just hitting the gong, once that's done, set the Strength to maximum and adjust the "Hard" adjustment so the solenoid doesn't drive the gong up against the upright.
The Battery Charging Indicator.
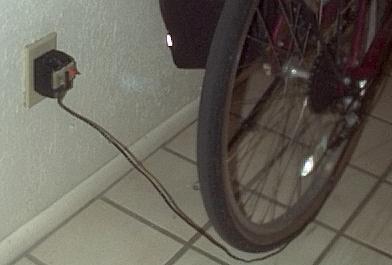
I got worried that the battery charger for my ancient Brite Lite head lamp on the recumbent bicycle I ride had no indicator that it was in fact charging the battery, a definite concern given that when a lead acid cell is fully discharged it is more than likely damaged beyond repair. If a wire fatigued or a connector broke (as has happened once already) without me noticing the cell would get flattened in rather short order and I'd have to find a replacement battery. So I rigged this circuit up:
The Brite Lite is a 7V system, if you cared to use this on a 13V system you could change the 1k ohm resistors to 2k. You could also probably use this on NiCad chargers as well. I use half of an LM339 because that comparator is good at running off a single power supply rail and it allows inputs to be at ground, something most op amps and comparators don't allow (it also happened to be what I had in the drawer). The inverting stage is necessary because the 339's output is open collector, grr, but hey, the rest of the package wasn't being used anyway. The circuit is also sensitive enough that when the battery reaches full charge the LED indicator goes out, which is really handy.
I just hot meld glued the circuit card to the front of the wall wart and then covered the exposed components with more glue ;) My camera's lousy for detail stuff, this is a good as I can get out of it:
Should you really want to communicate you can eMail to:
jforster@someplace.spam.dont.go
The Top.