
j.c.f.'s Overclocked Celery.
Last Updated 12/6/99.
Hits since 11/8/99:

Being a computer professional and a gamer to boot, the Intel Celeron and it's potential to be overclocked to hell and back was just too much to ignore, and in my time honored tradition if I'm gonna do something I usually really do it. Not content with relatively common or garden passive cooling techniques we went for the more exotic peltier effect cooling using a TEC (thermo electric cooling) element, having a faint sense of the practical we stopped short of water cooling however -- maybe one day but not now. There is a really cheap way to get into this field, MECI sell pulled TECs, PN 580-0047 for $17.95 a piece with a honking heat sink on it, all you gotta do is rip it apart and bolt it onto your CPU. Many thanks to Benchtest.com's cheap sandwich page that put us onto MECI.
These pictures were made as I dismantled the rig in preparation for overclocking the Athlon 500 so if you find weirdness it's probably due to this. I use a Asus P2B mother board so in order to increase the CPU voltage I had to cut tracks on the Celeron, thanks to Frank Monroe and his Overclocking faq, which ain't half as bad as the Athlon where you have to move surface mount resistors around (or build an overclocking jig which is what I did), however the Athlon kicks the celery's butt because you can change it's multiplier, ah, the blessed relief of an unlocked CPU where you don't have to overclock your whole system.
Follows then is the record of I how overclock the snott outta my celery:
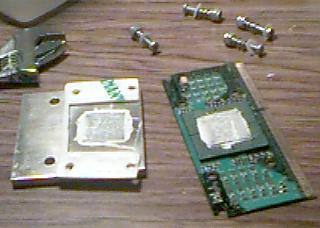
So whaddya have to start with?
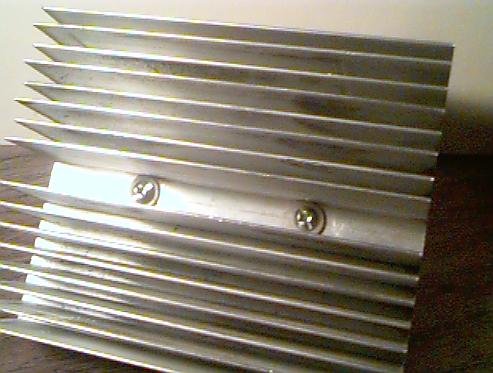
One honking heatsink, one lesser one, a useless cube of aluminum with a equally useless thermal cutout device, lotsa mess and a TEC element:

Whereas Benchtest.com chopped the honking heatsink up to fit it in the case I chose to move the power supply out of the case:

This is no sweat as the case almost never gets assembled anyway, all you need to do is to use a really big cold plate to offset the heatsink upwards a good bit so it clears the mother board:
The cold plate size is no particular burden other than the fact that if you fire the machine up from scratch and have the FSB jumpered to 103MHz (as opposed to using SoftFSB) you have to press reset for a while as the TEC cools down the cold plate, no big deal (I tend not to ever turn my machines off anyway).
The nuts, bolts, nylon washers and springs all come from Ace Hardware, springs are needed to not crack things as you tighten nuts up. The nuts are nylon lock nuts, no other way to get them to stay at a given tension, unless of course you wanna use lock tight or nail polish -- I prefer the lock nuts, easier to re-adjust.
The styrofoam is to fill the gaps left after bolting the heatsink on, you want as little air left inside the insulation for water to condense out of and kill your machine. Not that that's much of a problem, '98 (at least the way I use it) doesn't ever sleep, Linux OTOH, lets just say somone I know had a little condensation problem that dripped onto a nice video card that no longer functions...
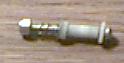
Next we've got the Celeron being bolted to the cold plate, nylon washers in place to stop the springs shorting tracks together:
Not too tight with them nuts, you can put quite a curve into that SECC, it is fiber glass after all, a little curve is fine, I stuff rolled up insulation under the edjes later to take the curve out to facilate insertion in the mother board.
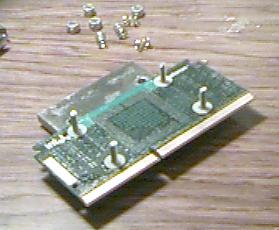
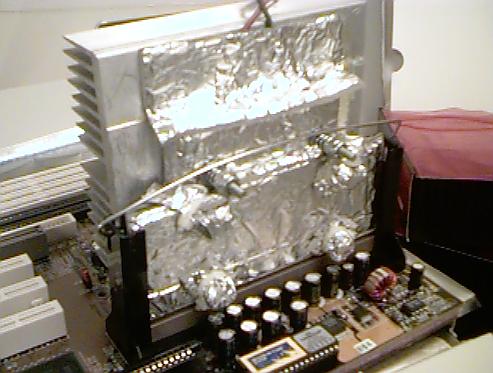
Here we've got the Celeron bolted to the cold plate with the styrofoam between the cold plate and the Celeron. There's a patch of thermal bonding compound (more commonally refered to as "thermal sh*t" around here) for the TEC on the cold plate. The the nut, bolt, nylon sleeve and spring assembly is used to hold the cold plate to the heatsink. The foreground shows detail of the TEC housing and how it has to be shaved, one before on the left and one after on the right:
I don't actually recommend using the plastic housing that comes with the MECI assembly, for the Athlon I stuck insulation on the cold plate leaving a hole for the TEC, actually TECs for the Athlon, one TEC isn't going to be able to pump the 60W or more that the Athlon will be shedding if I can get it up to 750MHz.
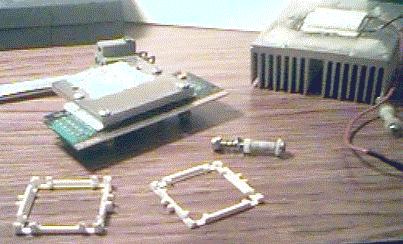
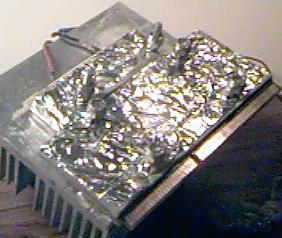
Now we've got the Ace self adhesive pipe insulation stuck over the front of the Celeron and the cold plate with the housing for the TEC in place:
That insulation is necessary not so much to prevent condensation should the CPU ever sleep but is there to stop heat from the heatsink warming up the cold plate or the CPU. You can see the TEC in position on the heatsink, in actually assembling this you'd have the plastic housing that is shown on the cold plate actually around the TEC on the heatsink. Those holes in the heatsink next to the TEC have been widened to facilitate the nylon sleeves that will stop the heatsink from heating up the bolts that hold it to the cold plate (and thereby heating the cold plate up).
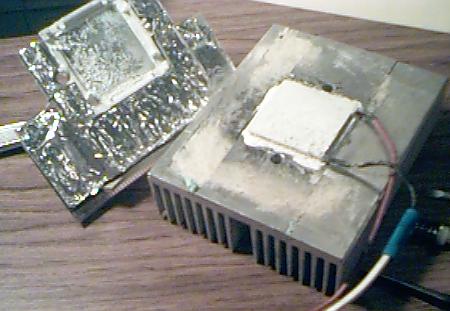
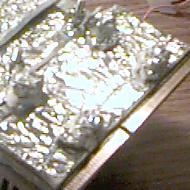
Cold plate and CPU in place:

Plus bolts, nylon washers washers, nylon sleeves, more thicker nylon washers, metal washers, springs and lastly nylon lock nuts:
Equals completely assembled rig missing only a few bits of insulation:
You'll notice I just have free pins on the end of the heatsink so I can pick and choose which voltage to run the TEC at, 5V, 7V (+ve goes to 12V and -ve goes to 5V) or 12V. When I build the Athlon running the TEC across the 12V and 5V rails (maybe even the 3.3V rail if I modify the power supply and bring out another connector) will have the added boon of providing a current shunt should the FIC SD-11 mother board need a bit more current than the generic 300W supply can provide which is utterly cool, I get to use the power twice, once to provide a heat pump for the CPU and again to bolster the supply rails, almost like something for nothing. I don't recommend using 12V, the TEC produces a lot of heat for not that much extra cooling, 8.7V (12V to 3.3V) OTOH should be fine. Nor do I recommend getting the polarity wrong either, it pumps heat the other way then...
A strip of insultation (sans aluminum, don't want it to fall off and short the componants on the mother board out) to seal the bottom of the cold plate:
And a couple of rolled up bits to straighten the CPU out:
The business end:
Note the nylon washers insulating those bolts.
A strip of insultation for the back of the CPU (it can get quite cold even through the fiber glass):
And some boots held on with cable ties (the other end of the bolt is on the cold plate) and a cap for the top of the cold plate:
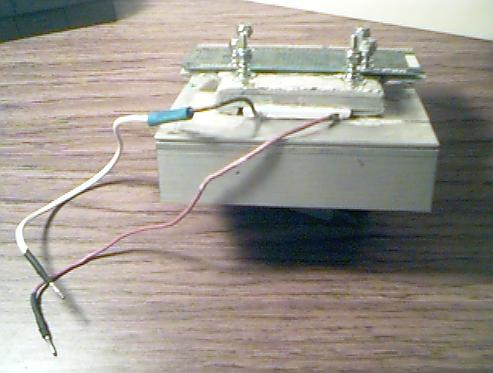
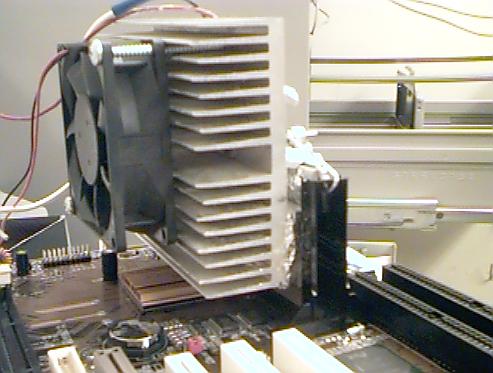
Complete and plugged in:
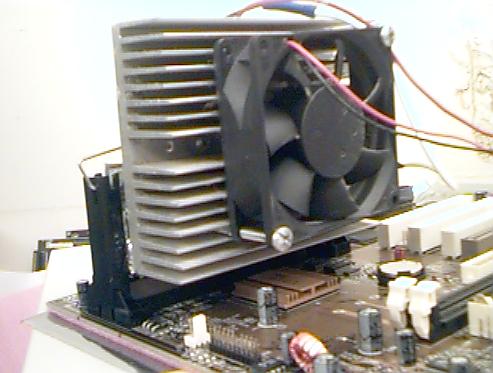
If you think that fan's big, check out the pics of the Athlon, it's got a 5 1/4" fan cooling it...
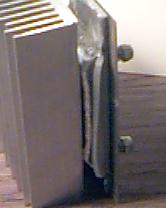
From behind showing the retaining clip (my celery doesn't fall out if you move the computer, unlike other peltier projects):

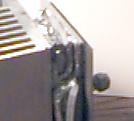
It even misses the DIMM slots:
Ok, ok, I hear ya, you wanna know what I get for all this effort. As far as absolute results are concerned not a whole lot, I get a 54% overclock with the plain jane OEM 300A I have. I hear ya, yeah, there's people getting 450MHz without peltiers -- but they don't have one of the latter day 300As, nor do they live in Tucson where an average swamp cooled house will hit 90oF in July. I can get a 50% OC in winter no problemo, no way in summer though. So with the peltier I can hit a rock solid 464MHz all year round, if I cared to push it I can get 504MHz but you need a low ambient room temperature and a bigger fan than I care to put up with.
Should you really want to communicate you can eMail to:
jforster@someplace.spam.dont.go
The Top.